The content of the article
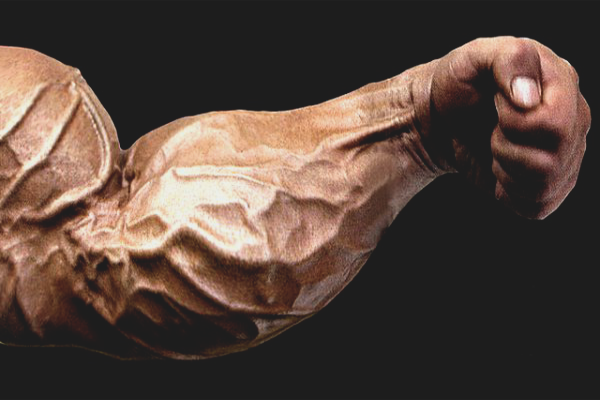
Wings and biceps are formed, the shoulder girdle is embossed and beautiful, and the forearms are thin, as if in a teenager? No wonder bodybuilders call them stubborn. Small muscles that control the work of fingers and hands, develop a long time. Do not do without weighting, because the forearm increases in volume due to the large weight and long workouts at a slow pace.
Dedicated to beginners
People who have recently become acquainted with sports want to modify their own body in three or four sessions. They spend their free time on horizontal bars and with dumbbells in their hands, exercising until exhaustion. Beginners do not know that it takes time to restore forearms. At least 2, and preferably 3-4 days. If this part of the hand is not enough rest, you can forget about the positive results.
Forearm devote one or two workouts a week. To warm up this group of muscles, perform exercises to modify the shoulder girdle and back. Actively load the biceps with triceps, working with the last force.Training end exercises for stubborn muscles. If you disrupt the sequence, positive changes can never be dreamed of.
Before picking up the weight, warm up the joints and ligaments. Exercises for the development of forearms is a huge burden. If you do not prepare the fingers with wrists, dislocations and tears of soft tissue can not be avoided. What to do? Stretch and knead brushes and all phalanges. Rotate palms bent into a fist. It is impossible to overstrain the area of the forearms and wrists. Regular intense load is a direct path to chronic pain, which is difficult to get rid of.
How many replays should be at a time? Beginner bodybuilders do from 15 to 18, professionals raise the bar to 25-30. What is the number of approaches for one workout? To 5. Depends on the level of training. If 2 trainings are devoted to training the forearms a week, then for each one different exercises are selected. The more varied the program, the faster the stubborn muscles develop.
Tip: It is not necessary to equip a mini-gym in the apartment. A simple and effective exercise is lifting a ten-liter bucket filled with sand.Inventory is carried around the room non-stop for 5–15 minutes. The appearance of the forearms will improve after 3-4 training sessions.
Barbells and dumbbells
Beginners who plan to do at home are recommended to get a collapsible barbell, dumbbells, or several weights. The athlete chooses the weight of equipment. If finances do not allow to buy inventory, professional weighting agents are replaced by sand bottles, a backpack filled with bricks, and bundles of books or newspapers.
Wrist pads or elastic bandages are worn over the wrists during training. They will protect the tendons from sprains, and the joints from dislocations. Weighting is raised slowly to feel how tense muscles.
Exercise 1
Become a classic starting position: legs apart to the width of the shoulder joints, back straight.
- In the hands to hold the barbell.
- The wrists are turned to the hips, the fingers tightly gripping the neck.
- Gently lift inventory to shoulder level and press to chest.
- Upper arms and shoulder blades do not move.
- Shoulders pressed to the ribs, elbows do not bulge.
- Slowly lower the weight.
- Hands remain slightly bent, muscles of a forearm are strained.
Exercise 2
- Sit on a low chair or bench, legs apart.
- Elbows rest on hips, wrists should hang down.
- The palms are facing the floor, the back is straight.
- Wrap your fingers around the empty bar from the bar, you can hang the smallest pancakes.
- Raise inventory only palms. The muscles of the forearm work, the rest of the body is relaxed.
- You can not too squeeze the neck with his hand. It is advisable to hold it with your fingertips so that the muscles tighten up.
- Follow the sensations in the wrists. If pulling pain occurs, reduce weight or stop the exercise.
Instead of a barbell, dumbbells are also used. Beginners start with 0.5–2 kg, then increase the weight of the inventory. Raise the dumbbells exactly as the neck, but it is important to ensure that both hands work synchronously. The upper limbs are slightly pulled forward to engage not only the ligaments, but also the muscles.
Exercise 3
- Continuing to sit with your legs wide apart, turn your palms with your wrists up.
- The elbows lie on the hips, the body leans forward, but the back remains flat.
- The neck or dumbbells should hang at your fingertips.
- Slowly pull the inventory, gently squeezing his hand.
- Try to keep the muscles of the chest and shoulders still. Only forearms should work, otherwise it will not be possible to achieve the desired result.
- When the palm is fully compressed, you need to stand still for 3-4 seconds.
- Gently lower the neck down on the fingertips, trying not to drop.
Exercise 4
- Become straight. It does not matter how wide apart the legs are. The main thing is to be comfortable for the athlete.
- Armed with dumbbells or bottles of sand, hands are lowered at the seams and pressed against the body.
- Unscrew the brushes so that the palms holding the weights are facing the ground.
- Only fingers and forearms work, elbows rest against the body and do not move.
- Bend the brush until it stops, turning the palms in the opposite direction. They should look at the ceiling.
Exercise 5
It uses the same muscle groups as the fourth option, but to perform it you will need a barbell:
- Spread your legs to the width of the shoulder joints, lower your arms along the body.
- Palms turned back, compress the barbell.
- With the help of fingers and wrists, raise and lower the weighting agent.
- The amplitude is small, the movement is slow.
- Sharp jerks are prohibited, otherwise injuries and sprains cannot be avoided.
- Only the muscles of the forearm and shoulder girdle are active. Do not strain your back and lower back much.
- Reaching the highest point, relax your palms and allow the bar to slide down.
- When the weighting agent hangs on your fingertips, rest for 2-3 seconds and repeat the ascent.
Exercise 6
You will need a collapsible dumbbell or stick with a weighting agent. The weight or pancake is fixed at one end, the other remains free.
- Stay upright. Lower the right or left hand along the body, put the second one on the belt or relax.
- Take up the free end of an improvised hammer.
- Rotate inventory to the sides, back and forth, as well as lower and raise.
- Only the wrist and the palm move. The upper part of the hand is pressed against the body.
Exercise makes the forearm volumetric and relief, forcing all muscle groups to work. But you need to carry it out carefully so as not to pull the wrist.
Exercise 7
You will need a stick, to which a weight is tied.Suitable removable pancake weighing 0.5-1.5 kg or just a piece of iron. The rope should be thick and strong. Take a stick and stretch your arm in front of you. Moving only the wrist, wind the rope with a weight on the base, and then unwind.
Other training options
To have developed forearm, it is not necessary to acquire dumbbells. It is enough to hang a bar in the apartment, which will replace the horizontal bar, and buy a rope. You will need a small weighting, which can be replaced with improvised items or purchased in a sports store.
Weights attach to the legs and begin to train. After the warm-up is recommended to hang on the bar. Do not pull up, but simply tighten your legs and tighten the muscles of the shoulder girdle and forearms, slightly bending the arms at the elbows. Hang no more than 30 seconds. Make a few approaches, then switch to a jump rope.
Useful for forearm boxing, only gloves should be burdened. You can attach weights to your wrists, but so that they do not interfere with your hands moving. Boxing with weights develops the muscle group responsible for flexing the fingers.
Lying on the floor
Buy in a pharmacy hard rubber bandage.Snap one edge to the leg of the sofa or to another massive furniture. The second wind on the fingers, lie on the mat or just on the floor. The bandage is perpendicular to the body, is on the outside. Hands are pressed to the body, only wrists move. To attract the bandage to yourself and let go, imitating the struggle on your hands. If you need to increase the load, the rubber band is folded several times and slightly moved away from the sofa.
You can do the exercise and standing, pressing the bandage to the floor with your foot.
On the horizontal bar
How to pump forearm with crossbar? Pull up, holding the tube only with your fingertips. Make sure that it is the muscles that are working, not the tendons.
There is a second option:
- Throw a towel or a piece of rope over the crossbar.
- Grab it with one hand, bending it at the elbow.
- Hang 30–60 seconds. You can at this time to raise and lower the legs to pump more and press.
The muscles of the forearm are not for nothing called stubborn. In order for them to grow to the required volume, you will have to work hard and not miss classes. But if you regularly train, increase the load and believe in yourself, the result will appear after a few months.
Video: how to pump your forearms at home


To send